How to Make a Pinecone Pendant: A Step-by-Step Guide
How to Make a Pinecone Pendant: A Step-by-Step DIY Guide
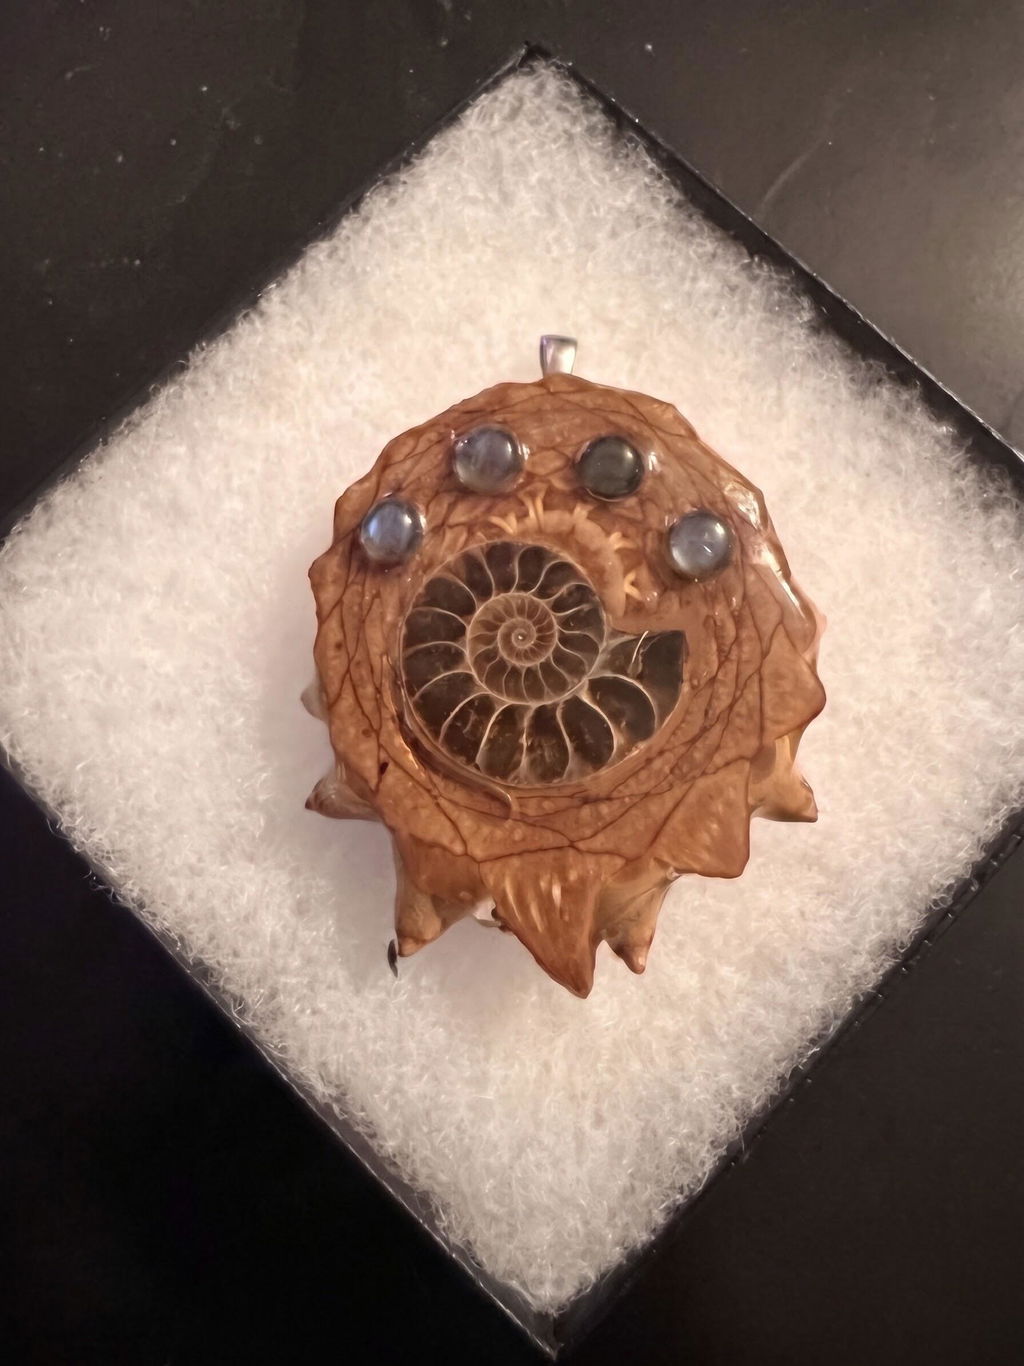
How to make a pinecone pendant allows you to transform raw forest harvests into stunning, wearable nature art. Sliced from the dense core of a closed Knobcone pine cone (Pinus attenuata), these handmade centerpieces reveal intricate, sacred geometry patterns hidden deep within the wood. When sanded smooth, inlaid with gemstones, and sealed with high-gloss resin, learning how to make a pinecone pendant gives you the power to craft custom heirloom jewelry that lasts a lifetime.
Whether you are an aspiring artisan or a craft hobbyist wanting to master how to make a pinecone pendant at home, this detailed guide covers every step—from selecting raw cones to resin sealing and adding jewelry hardware.
Tools and Materials Needed
Before diving into how to make a pinecone pendant, gather the proper equipment. Because Knobcone pinecones are notoriously dense, using the right tools ensures clean cuts and safe handling.
Essential Equipment & Supplies
- Knobcone Pinecones (Pinus attenuata): Unopened, tightly closed cones preserve the inner geometric cross-section best.
- Bandsaw or Fine-Tooth Scroll Saw: Necessary for clean cuts through rock-hard pine fibers without crushing scales.
- Baking Sheet & Aluminum Foil: For curing raw cones and clearing sap.
- Assorted Sandpaper (120 to 600 Grit): Essential when learning how to make a pinecone pendant with a smooth, professional feel.
- Clear Epoxy Resin or UV Resin: Adds a protective, glass-like finish that brings out wood grain contrast.
- Rotary Tool (Dremel) with Micro Drill Bits: Used for carving stone cavities and mounting hardware holes.
- Jewelry Hardware: Screw eye pins, jump rings, bails, and necklace cording.
Optional Accents
- Crushed raw gemstones (amethyst, turquoise, moonstone, lapis lazuli).
- Small cabochons or crystal points for central inlay work.
Step 1: Sourcing and Preparing Raw Pinecones
A crucial step in how to make a pinecone pendant successfully is proper prep work. Raw forest pinecones contain moisture, sticky pitch, and hidden debris that must be eliminated first.
- Clean the Exterior: Brush away dirt, moss, and loose debris using a stiff bristle brush.
-
Bake and Cure: Line a baking sheet with foil and bake your pinecones at 200°F to 220°F (95°C–105°C) for 1.5 to 2 hours.
Why this step matters: Baking kills any hidden larvae and bakes off sticky tree sap, hardening the natural fibers for clean slicing.
- Cool Completely: Allow the cones to cool to room temperature before attempting to cut them.
Step 2: Slicing the Pinecone Core
The secret of how to make a pinecone pendant with a striking mandala pattern lies in accurate cross-section slicing.
- Secure the Cone: Place the pinecone into a wood clamp, push block, or specialized jig. Never hold a pinecone near a saw blade with bare hands.
- Make Horizontal Cuts: Using a bandsaw equipped with a fine-tooth blade (14–18 TPI), slice horizontally across the cone perpendicular to its center stem.
- Harvest Ideal Slices: Aim for a thickness between 1/4 inch and 3/8 inch (6mm–9mm). Slices that are too thin will crack easily; slices that are too thick will feel heavy around the neck.
Step 3: Sanding and Shaping the Slice
Raw cuts leave visible blade marks and rough edges. Proper sanding is a core technique when figuring out how to make a pinecone pendant that feels comfortable against the skin.
- Flatten the Base: Lay 120-grit sandpaper flat on your work table. Rub both sides of the slice in a figure-eight motion until the faces are completely flat.
- Refine the Grain: Move progressively through 220, 400, and 600-grit sandpapers to polish the exposed wood surfaces.
- Clear Debris: Clean out fine sawdust from the inner crevices using compressed air or a dry tack cloth.
Step 4: Adding Gemstone Inlays (Optional)
If you want to know how to make a pinecone pendant that stands out from basic wood crafts, adding custom stone inlays elevates the entire piece.
- Prepare the Center Cavity: Use a rotary tool with a small carving bit to gently expand the seed chamber in the middle of the slice.
- Set the Stone: Apply a small drop of clear jewelry epoxy inside the cavity, then seat a gemstone cabochon, raw crystal, or crushed stone chips inside.
- Let Cure: Allow the adhesive to cure completely before moving to the finishing coat.
Step 5: Sealing with Protective Resin
Knowing how to make a pinecone pendant durable requires sealing porous wood against moisture and everyday wear.
- Apply a Thin Base Coat: Brush a thin layer of UV resin or clear epoxy onto both sides. This preliminary coat seals air inside the wood pores and prevents bubbles from forming later.
- Pop Air Bubbles: Briefly pass a heat gun or butane torch a few inches over the surface to pop trapped bubbles.
- Full Coat or Dip: Apply 2–3 thin coats of resin, curing each coat thoroughly, or submerge the entire pendant into a resin dip bath while suspended by a thin wire.
- Cure Fully: Let the resin set until it is completely hard, tack-free, and crystal clear.
Step 6: Drilling and Hardware Installation
The final phase of how to make a pinecone pendant is turning your polished cross-section into wearable jewelry.
- Mark the Top Point: Find the top center of your pendant where the natural symmetry lines up vertically.
- Drill a Micro Hole: Using a rotary tool with a 1mm bit, carefully drill a shallow hole down into the top edge of the wood slice.
- Insert Screw Eye Pins: Dip the threads of a small screw eye bail into a tiny dab of epoxy and thread it securely into the hole.
- Attach Cording: Loop your favorite leather cord, braided hemp, or metal chain through the top bail.
Pro Tips for Making Pinecone Pendants
- Prevent Bubbles with Pre-Sealing: The most common mistake when mastering how to make a pinecone pendant is rushing straight to thick resin. Always apply a thin sealing coat first so wood pores do not vent air bubbles into your main finish layer.
- Wet-Sanding Resin: If your cured resin finish has minor uneven spots or drips, wet-sand the cured resin using micro-mesh pads (1,000 to 12,000 grit) before applying one final gloss coat.
- Never Cut Fresh Cones: Always verify your pinecones are fully dry and baked before cutting; damp wood warps and ruins resin adhesion over time.
Check out smokinresincompany.com for our selection of Pinecone Pendants that are available for purchase!!